Tuesday, December 7, 2010

Moroccan Chicken with Preserved Lemon

I made this exciting chicken the other night for a weekday dinner and am just now getting around to posting it. Admittedly, this was a lot of work on the front end but I was surprised how little work it was near the end. Recipe to follow...


Moroccan Chicken with Preserved Lemon

1 cinnamon stick
1 teaspoon whole black peppercorn
1 teaspoon cumin seed
1 teaspoon sweet paprika
1 teaspoon red pepper flakes
1/4 teaspoon whole clove
3 tablesppons extra-virgin olive oil
4 cloves garlic
1 teaspoon ginger
2 bay leaves
1 large pinch saffron
3.75 lbs boneless skinless chicken breasts
salt and pepper
1 medium onion
4 preserved lemons
1/2 cup dried green olives
1.5 cups chicken stock

I added the cinnamon, peppercorns, cumin, paprika, red pepper flakes, and cloves to a skillet dry skillet and cooked them over medium high heat until they started to smoke. Then I grinded them in out spice grinder.

I cut the chicken into 10 pieces and added the smoked spice mixture along with the oil, garlic, bay leaves and saffron. I tossed this until the chicken was thoroughly coated though I wish I would have tossed and then added the bay leaves because they got a bit crushed in the process.
I then allowed the chicken to marinade for two hours.

In a large pot I browned the chicken and then set it aside. In the same pot I added the onions rough cut and browned on medium high. Then I added the 2 preserved lemons cut into strips with the flesh removed. Then I added the olives and chicken stock and re-added the chicken. I covered and cooked on low for about 30 minutes.

I served it with quinoa which I made with 2 more preserved lemon and a handful of tart dried cherries. Andrea thought the lemon was good but after half a bowl she thought it was too much. Not surprising because I quadrupled it from the original recipe. Maybe next time I'll leave it out of the quinoa.

Later, I'll have to post about preserving the lemons. I did it during the late summer and it couldn't have been easier.


\\\

Thursday, December 2, 2010

Celtic Knot Border

Remember how I said I found some new books from the library from my new favorite author, Aidan Meehan? Well, I love em! I've been learning a lot and seriously recommend any of his books to anybody interested in Celtic art. They are approachable and extremely detailed. Truly a wonder to use.

I thought it might be fun if I posted some of my recent work. I worked through much of the book on Celtic knots and finished with a border. But instead of just showing you the pretties I thought it would be even better to show you how much work goes into the process...


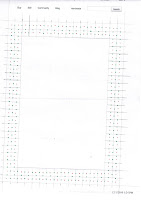
The first thing I must do is draw my primary grid. The intersection of this primary grid are the basis for the whole pattern.


Then I am able to add my red dots for the secondary grid. I draw these in red because I think of the secondary grid as a no-go area. My knot pattern should never intersect these spaces.


Finally, I added the tertiary grid. I draw these in green because my knot pattern will flow from tertiary intersection to tertiary intersection in an alternating over under pattern. Meehan argues that one needn't draw the tertiary grid but I am finding that it's a nice crutch to have. Plus I am interested in this work with an eye toward pottery as the eventual application. Thus I don't need to worry so much about cluttering the space because all the grid dots and line breaks will burn off in the kiln, leaving my knot pattern alone.


Finally I am able to draw in my line breaks. I determined my pattern and then drew in primary and secondary grid breaks to make the pattern I wanted.


All that was left was to begin to follow my pattern. It's always over under and never cross a line break. Thus the path is clearly marked.


Nevertheless I did make two mistakes... In the bottom right of this image I have a red, secondary, line break which is one unit too far to the right. Notice that it made the only s-curve in the pattern. Also, in the upper left of the image I drew a over/over/under knot. Oops...

Otherwise I'm extremely pleased. And it was good practice. I think it's real safe to say that pie plates, pasta bowls, coffee mugs and all other variety of pottery is likely going to have a knot treatment in the near future!